How to Do Chemical Peels at Home Safely

Last updated on March 19th, 2026 at 07:29 pm

Chemical peels get results that most daily skincare products can’t. They work by dissolving the glue that holds dead skin cells together, so your skin cells shed faster and you get a more even skin tone. That’s how they clear dark spots, smooth texture, and improve dullness in a way that serums and moisturizers typically don’t.

But there’s a real risk here and you need to understand it before you start. At-home peel injuries are documented and avoidable, and nearly every case comes down to the same mistake. People focus on concentration when contact time is actually what controls how deep a peel goes. Get that wrong and you can cause burns, scarring, or hyperpigmentation that takes months to reverse.

When you choose a mild acid suited to your skin and follow the right timing, at-home peels are safe and effective for clearing hyperpigmentation, evening skin tone, and smoothing texture. This guide walks you through exactly how to do that.

How to Do Chemical Peels at Home Safely

Chemical Peel Quick Start Guide

Already familiar with peels? This is your quick reference. If you’re a complete beginner, read through the full guide first and come back here. It’ll make a lot more sense.

  • Choose your acid. Lactic acid 30% or mandelic acid 20-25% are the safest starting points for most people
  • Prep your skin for 2 weeks before your first peel by using an 8-10% AHA toner or serum, starting 2-3 times a week and building up as your skin tolerates it
  • Patch test on your inner arm 48-96 hours before peel day. Any redness or irritation means don’t proceed
  • Stop your prep product 2 days before peel day so your skin isn’t freshly exfoliated when you apply the peel
  • Keep your first peel to 30 seconds only, then rinse. Contact time controls strength, not concentration
  • Plan your first peel for a Friday evening so you can stay indoors over the weekend
  • Wait 4 weeks between treatments
  • Use SPF 30 or higher every day for 8 weeks after each treatment
  • Expect real improvement after 3 to 6 treatments over 2 to 3 months

One thing worth knowing before you even buy a product. If you have never used any acid in your routine before, spend 2 to 3 months using an acid toner regularly first. Going straight to a peel without that foundation increases your risk of irritation significantly.

How Chemical Peels Work

At-home peels work on the epidermis, which is the outermost layer of your skin. The acid dissolves the bonds holding dead skin cells together, so those cells shed faster than they normally would. As that dead layer clears, you get smoother texture, more even skin tone, and less congestion. Dark spots fade because the pigmented surface cells are turning over faster and being replaced.

But peels have limits. They don’t reach the dermis, which is the deeper layer where sagging, deep wrinkles, and severe scarring live. If those are your main concerns, at-home peels won’t fix them. That boundary is also what makes them safe for home use.

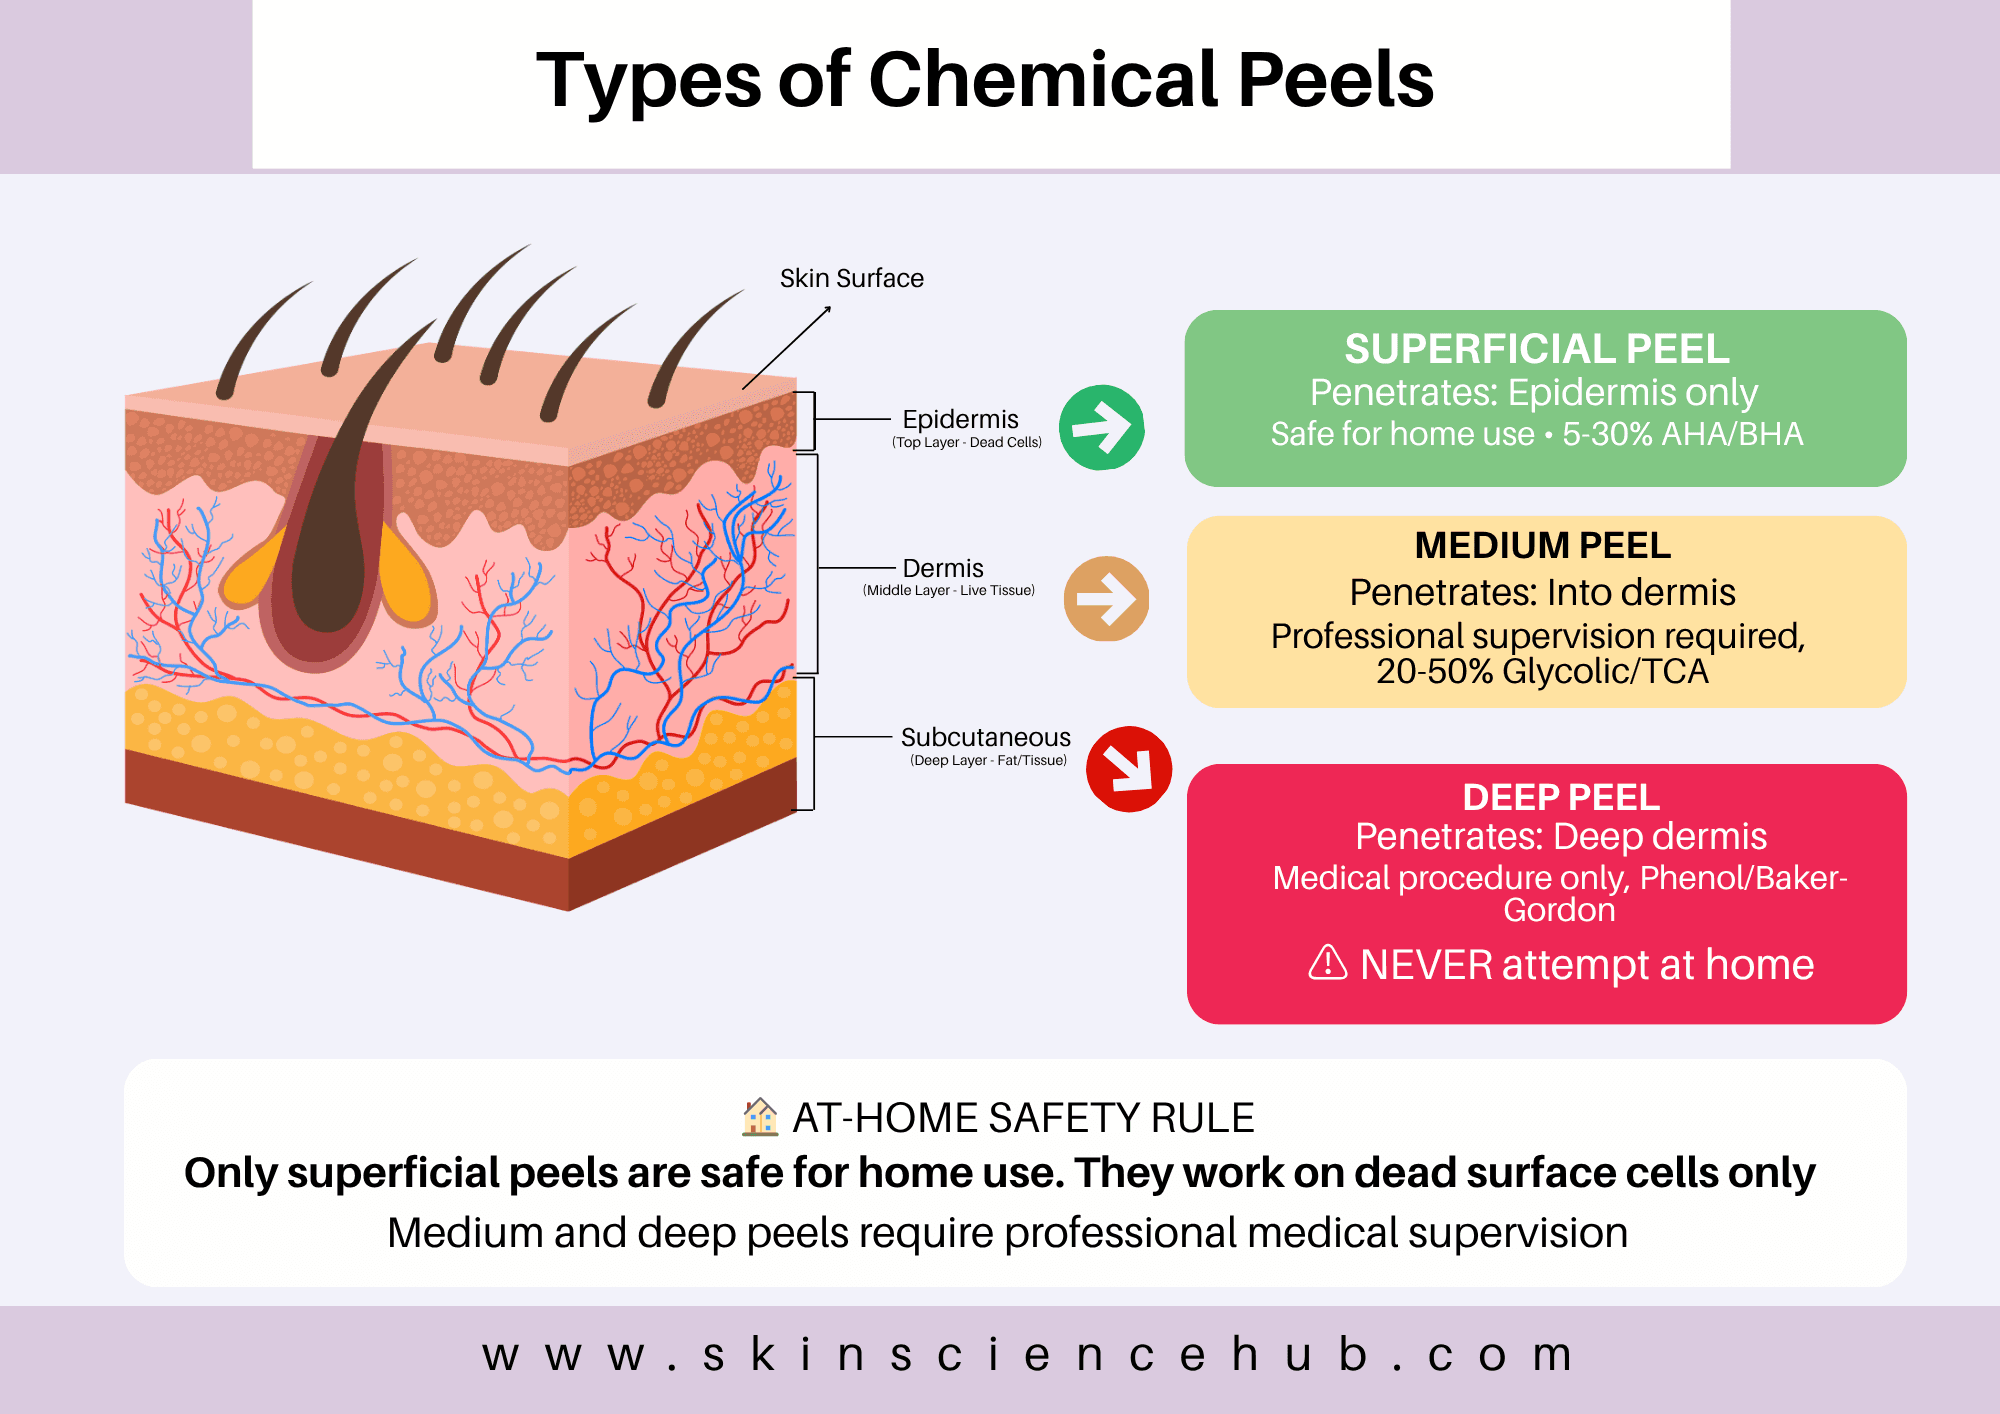
Types of Chemical Peels: Superficial, Medium and Deep

Chemical peels are grouped by how deep they go, and that depth determines what they treat, how much downtime you need, and whether you can safely do them at home.

Superficial peels work on the epidermis only. They treat mild acne, hyperpigmentation, fine lines, and dullness using 5-30% AHAs or 2-20% BHAs, with 1-3 days of downtime. When done correctly, they are safe for all skin types. This is your only option for home use.

Medium peels go into the upper dermis and address moderate wrinkles, deeper acne scars, and sun spots. They use 20-50% glycolic acid or 10-35% TCA, with 7-10 days of visible peeling. If you have darker skin, the hyperpigmentation risk is significantly higher. These require a professional.

Deep peels reach the lower dermis and treat severe wrinkles, deep scarring, and significant sun damage using phenol. Because phenol affects cardiac function, these are performed with heart monitoring in a surgical setting. They can also permanently lighten your skin. Never attempt these at home.

Diagram showing three types of chemical peels and skin depth penetration

Is a Chemical Peel at Home Right for You?

Before you buy anything, make sure at-home peels are actually right for you. Some situations make them genuinely unsafe.

Active Skin Conditions

Don’t do a peel if you currently have cold sores, eczema, psoriasis, rosacea, sunburn, a bacterial skin infection or a damaged skin barrier. The same goes for freshly shaved skin, which has tiny invisible cuts that make it more vulnerable to irritation. Wait until your skin has fully healed before attempting one.

Pregnancy and Nursing

Avoid peels entirely until you have finished nursing. This isn’t the time to experiment with strong acids on your skin.

Medications

If you are currently on Accutane, or finished it within the last 6-12 months, don’t do peels. The same applies if you take any medication that increases sun sensitivity, because your skin’s response to acid will be unpredictable.

Medical Conditions

A history of keloid scarring, heart problems, lupus, very thin skin with visible blood vessels, or severe seborrheic dermatitis all require medical clearance before you attempt any peel.

Darker skin tones

If your skin falls in the Fitzpatrick 3-6 range, talk to a dermatologist first. You have a higher risk of post-inflammatory hyperpigmentation, and getting the acid choice right matters more for you than for anyone else.

Mental Readiness

This one doesn’t get talked about enough. Your skin will look worse before it looks better, and the process is uncomfortable. If you are anxious about temporary changes in your appearance or easily distressed by how your skin looks during recovery, wait until you feel genuinely ready. That’s not a weakness, it’s self-awareness.

Best Acids for At-Home Chemical Peels

  • This post contains affiliate links. All recommendations based on ingredient research and formulation analysis. Purchasing from this link helps this site at no additional cost to you. Please read our affiliate disclosure for more information

You have four safe options for home use, and each one suits different skin types and concerns. The right choice depends on what you’re treating, not just what’s most popular.
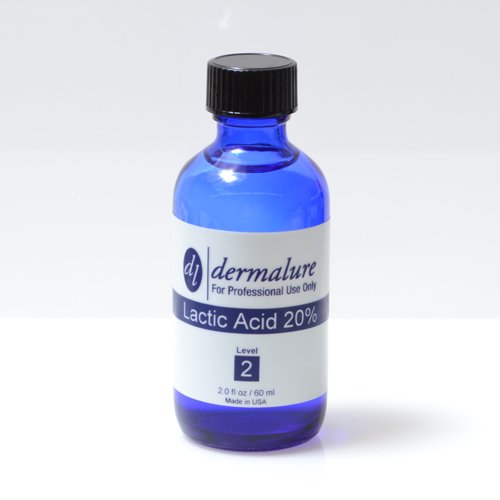
Lactic Acid

Lactic acid is the gentlest of the four and the best starting point if you have sensitive or dry skin. It exfoliates while also hydrating, and because its molecule is larger than glycolic acid, it penetrates more slowly and causes less irritation. It works well for dullness, mild pigmentation, and uneven texture. Look for MUAC Lactic Acid Peel, Demalure Lactic Gel Peel (30%), or Demalure Lactic Acid Peel (20%). Check that the pH sits between 3.5 and 4.0.

Glycolic Acid

Glycolic acid gives the most dramatic results for fine lines, sun damage, and stubborn pigmentation because it has the smallest molecule and penetrates deepest. That also makes it the most potentially irritating, so only move to glycolic after you have used gentler acids without issues. Home-use strengths range from 5-30%. Look for The Ordinary AHA 30% + BHA 2% Peeling Solution or Drunk Elephant T.L.C. Sukari Babyfacial, and check that the pH is between 3.0 and 3.5.

Salicylic Acid

Salicylic acid is oil-soluble, which means it gets into pores rather than just sitting on the surface. That makes it the best choice for oily skin, acne, blackheads, and enlarged pores. It also has anti-inflammatory properties that help calm active breakouts. Look for Perfect Image Salicylic 10% Gel Peel or Pure Original Ingredients Salicylic Acid 17% Solution. Avoid this one if you are allergic to aspirin.

If you’re weighing options for acne-prone skin, our salicylic acid comparison guide walks through how it stacks up against other acne acids.

Mandelic Acid

Mandelic acid has the largest molecule and the slowest penetration of the four, which makes it the best choice if you have dark or darker skin, or very reactive skin. The slower absorption reduces the risk of post-inflammatory hyperpigmentation, which makes it a safer starting point than glycolic or lactic acid for Fitzpatrick types 3 and above. It also helps with mild acne. Look for Cellbone Mandelic Acid 20% Peel.

Why pH Matters for Chemical Peels

Concentration alone doesn’t tell you how strong a peel is. A 30% AHA at pH 2.0 penetrates significantly deeper than 30% at pH 3.5, because lower pH means more of the acid is in its active form. For safe home use, look for products with a pH between 3.0 and 4.0. If a product doesn’t list its pH, contact the brand or check independent reviews before buying.

Acids to Avoid for At-Home Peels

TCA (trichloroacetic acid) is unpredictable and difficult to apply evenly compared to AHAs and BHAs. Even though some brands sell low-percentage versions for home use, the margin for error is narrow enough that it’s best left to professionals. Jessner’s peel combines multiple acids and goes deeper than you want for home use. When in doubt, start with lactic or mandelic acid and work from there.

How to Prepare for a Chemical Peel

The two-week prep rule

Before attempting any peel stronger than 10%, you need to prep your skin with a gentler version of the same acid type for at least 2 weeks. This builds your skin’s tolerance and significantly reduces your risk of irritation, redness, and discomfort when you step up to the stronger peel.

If you’re planning an AHA peel like glycolic or lactic, use an 8-10% exfoliating toner or serum. If you’re planning a salicylic peel, use a 2% BHA toner or serum. Start 2-3 times a week during the first week, then increase frequency as your skin tolerates it. Some people work up to daily use by week two, others stay at every other day. Both are fine.

Skipping this step is one of the most common mistakes beginners make, and it’s usually why first peels go badly.

Two weeks before your peel

Stop all retinoids. For most superficial peels, stopping Retin-A or tretinoin 2-3 weeks before is enough. But if you have sensitive skin or plan to use stronger concentrations, you may need to stop up to 3 months before. If you’ve been on Accutane, wait at least 6-12 months after finishing before attempting any peel.

Stop vitamin C serums and all other acids, except your prep acid. Continue using your prep acid at your normal frequency right up until 2 days before peel day. Your skin should not be freshly exfoliated when you apply the stronger peel.

Avoid sun exposure and use SPF 30 or higher every day. Also avoid waxing or any facial hair removal during this period.

Patch Test 48-96 Hours Before

Apply the peel to your inner arm exactly as you plan to use it on your face. Check the area at 24, 48, and 96 hours. Any redness, burning, or itching means don’t use it on your face. It’s much better to find out on your arm.

Chemical Peel Side Effects and Risks

Most people who follow the process correctly experience nothing worse than mild redness and tingling. But when steps get skipped or timing gets ignored, serious complications happen. These are the ones worth knowing about.

Chemical burns occur when the peel is left on too long or the concentration is too strong for home use. This is why starting with short contact times matters more than starting with low concentrations.

Permanent scarring can result from burns or from picking at peeling skin. Let the skin shed on its own, no matter how tempting it is to pull at it.

Hyperpigmentation or hypopigmentation can develop if you skip sun protection during recovery or use a peel that’s too strong. Your dark spots can actually get worse instead of better if you rush this.

Infections happen when you apply a peel to broken or compromised skin, or touch your face with unclean hands during the process. Only apply to intact, healthy skin.

Eye damage can occur if the solution contacts your eyes. Keep peels well away from the eye area and have water nearby in case of accidental contact.

Rinse immediately and get medical attention if you experience severe burning that doesn’t stop after rinsing, blistering, white or grey patches on your skin, extreme swelling, signs of infection like fever or pus, or difficulty breathing. Don’t wait to see if it improves.

Every one of these risks is avoidable. They almost always trace back to the same things, leaving the peel on too long, rushing the prep phase, or not protecting skin from the sun afterward. Follow the process and you protect yourself from all of them.

How to Apply an At-Home Chemical Peel

Applying a chemical peel at home is straightforward when you follow the steps in order. Read your product instructions all the way through before you start, and check whether your peel is self-neutralizing, meaning you just rinse it off, or whether it needs a separate neutralizer solution.

Get everything ready before you touch your face. You’ll need your timer, cotton pads, petroleum jelly, and neutralizer if required. You don’t want to be searching for supplies with acid already on your skin.

On peel day, avoid all exfoliation in the 24 hours before your treatment. No scrubs, no brushes, nothing that heats or stimulates your skin. The peel is your exfoliation for the day.

Wash your face with a gentle cleanser and wait 10 to 15 minutes until your skin is completely dry. Pull your hair back and apply petroleum jelly around your eyes, nostrils, lips, and the creases from your nose to your mouth. These areas are more sensitive and need protection from the acid.

Pour a small amount of peel onto a cotton pad and apply a thin layer in this order: forehead, cheeks, nose, chin. Stay well away from your eye area and lips, and start your timer the moment you finish applying.

Contact time by treatment

TreatmentContact Time
1st treatment30 seconds
2nd treatment (4 weeks later)1 minute
3rd treatment (4 weeks later)1.5 minutes
4th treatment (4 weeks later)2 minutes
Each treatment afterAdd 30 seconds
Maximum5 minutes

You’ll feel tingling during application and that’s normal. But if you feel severe burning, see white or grey patches forming, notice any blistering, or have difficulty breathing, rinse immediately and don’t wait for the timer. Rinse first, worry later.

When your timer goes off, follow your product’s instructions. Self-neutralizing peels just need rinsing with cool water for at least 30 seconds. Peels that require a neutralizer need that applied first, then rinse with cool water. Pat your face dry gently.

Apply a gentle moisturizer straight away and add petroleum jelly if your skin feels tight. No makeup for 24 hours and no active ingredients for two full weeks.

One thing worth knowing about contact time: a 20% peel left on for 5 minutes can actually be stronger than a 30% peel left on for 1 minute. Concentration and time work together, so never try to compensate for a lower concentration by leaving a peel on longer. Follow the table above and let the timing do its job.

Step-by-step guide for applying chemical peel at home safely

Chemical Peel Aftercare

Your skin has just been through something deliberately disruptive. The acid accelerated cell shedding and your barrier is temporarily compromised, which means what you do in the days after matters as much as the peel itself. Recovery is where the results actually happen.

First 24-48 Hours

Your skin is flushed, sensitive, and working hard to repair itself. Keep your routine stripped back to the essentials. Apply a gentle moisturizer 3 to 4 times throughout the day because your barrier needs hydration to heal properly. Use SPF 30 or higher if you go outside, reapplying every two hours. Stay indoors if you can manage it for the first 48 hours. No makeup, no sweaty workouts, and no hot water on your face. If peeling starts, let it happen on its own and resist touching it.

During Active Peeling (Days 3-7)

This phase looks worse than it is. Your skin is shedding the treated layer and building new skin underneath, and that process needs protecting. Put your normal face wash away for now because cleansing during active peeling disrupts the new skin forming beneath the surface. Cool water and moisturizer is genuinely all you need during this phase. Once the peeling settles, usually around day 7, you can return to gentle cleansing.

What to avoid for one week

Heat is a real problem after a peel and most people don’t realise it. Saunas, hot yoga, hot baths, and long hot showers all stimulate melanin production in freshly treated skin, and that can trigger hyperpigmentation even if you’re wearing sunscreen. Keep things cool for the first week.

What to avoid for two weeks

Your skin needs a full two weeks before it’s ready for anything active again. That means no scrubs, no glycolic acid, no salicylic acid, no lactic acid, no benzoyl peroxide, no sulfur, no resorcinol, and no Retin-A. Introducing exfoliants too soon is one of the most common reasons people end up with irritation and uneven results after a peel. Give your skin the window it needs.

Sun Protection for Eight Weeks

This is the part most people underestimate. Your skin stays more vulnerable to UV damage for a full eight weeks after peeling, not just the first few days when it looks raw. Use broad-spectrum SPF 30 or higher every single day and reapply every two hours. If you’re treating hyperpigmentation, this step is non-negotiable because UV exposure during recovery can make dark spots worse than they were before you started.

Warning signs to watch for

Some redness, tightness, and peeling are normal and resolve on their own. But certain reactions need attention. Severe itching beyond mild discomfort, swelling beyond normal pinkness, redness that gets worse instead of better, and persistent stinging all warrant professional advice.

If dark spots develop after your peel, they usually fade within a few weeks with strict sun protection. But if they’re still there after 2 to 3 weeks, see your dermatologist.

Call your dermatologist right away if you notice spreading redness, increasing pain, fever, or pus. These are signs of infection and need treatment quickly.

Chemical Peel Results: Timeline and Recovery

At-home peels improve texture, even out skin tone, lighten hyperpigmentation, and soften fine lines. But they won’t erase deep wrinkles, lift sagging skin, or eliminate deep acne scarring. Knowing what to expect before and after each treatment helps you stay the course when your skin looks worse before it looks better.

Right after your peel, your skin will be red and flushed. You may have felt tingling or mild burning during application, which is normal. Don’t expect visible change on day one.

By days two and three, your skin starts looking tan or dark, sometimes patchy. This is expected and doesn’t mean anything went wrong. It’ll feel tight and dry, and peeling usually starts around the mouth and chin first. This is often the most discouraging point in the process, but it’s also a sign the peel is working.

Between days three and seven, peeling spreads across your face in a predictable pattern, mouth and chin first, then cheeks, then around the eyes, with the neck and forehead last. Let the skin shed on its own. Pulling at loose skin causes irritation and can trigger hyperpigmentation. Light at-home peels may only cause mild flaking or no visible peeling at all, and that doesn’t mean the peel didn’t work.

Weeks two to four are when you start seeing real change. Smoother texture, brighter tone, dark spots fading, pores looking smaller, and fine lines softening. This is the payoff for getting through the uncomfortable early days.

After three to six consistent treatments over two to three months, you’ll see noticeable improvement in hyperpigmentation and fine lines. Your skin will feel smoother and look more even overall

If You Are Using Chemical Peels for Acne – You may break out more during your first few treatments as the peel clears congestion sitting below the surface. This is temporary purging, not your skin getting worse. Most people see real improvement after three to four peels.

How Long Do Results Last? – Results last several weeks to a few months per treatment. Most people do maintenance peels every four to six weeks to sustain the improvement. Without maintenance, your skin gradually returns to its previous state.

Chemical peel recovery timeline showing day-by-day skin changes

How Often to Do At-Home Chemical Peels

Start with one peel every 4 weeks. After 2 to 3 treatments, once you understand how your skin responds, you can move to every 2 weeks if your skin is tolerating it well. Some experienced users go weekly, but most people don’t need that frequency and it increases the risk of over-exfoliation.

Before each treatment, honestly assess your skin from the last one. If you had irritation that lingered, don’t increase strength or frequency. Stay at the same level until your skin is completely calm.

Fall and winter are the best seasons to start a peel series. Sun exposure after a peel significantly increases your risk of hyperpigmentation, and cooler months make it much easier to stay out of direct sunlight during recovery.

Watch for these signs that you’re overdoing it. Persistent redness that doesn’t resolve between treatments, increased sensitivity to everything, skin that looks shiny and tight, more breakouts than usual, or constant flaking. If you see any of these, stop all peels for 4 to 6 weeks and let your skin fully recover before starting again.

Bottom Line

At-home chemical peels work when you respect the process. Choose the right acid for your skin, prep for two weeks first, follow the timing exactly, and protect your skin from the sun afterward. Results take 2 to 3 months of consistent treatments, so patience is part of the process. When in doubt, see a dermatologist.

FAQ

You’ll feel tingling and mild stinging during application, and that’s normal. The sensation should stay uncomfortable but tolerable for the short contact time. If it crosses into sharp pain or severe burning, rinse immediately. Most people find it manageable once they know what to expect.

A self-neutralizing peel stops working on its own as the acid gets neutralized by your skin’s natural pH. You just rinse it off with cool water when your timer goes off. Non-self-neutralizing peels need a separate neutralizing solution applied before rinsing. Always check your product instructions before you start so you know which type you have and have everything ready.

Most at-home peel products range from around $15 to $60 per bottle, and a single bottle typically gives you multiple treatments. Compare that to a professional peel which can run $150 to $300 or more per session, and at-home peels are significantly more economical for maintenance use.

You can, but it’s harder to do safely. Sun exposure after a peel significantly raises your risk of hyperpigmentation, and summer makes strict sun avoidance during recovery much more difficult. If you do peel in summer, be rigorous about SPF 30 or higher every day and avoid prolonged time outdoors for at least 8 weeks after each treatment. Most people find it easier to start a peel series in fall or winter.

Yes, when you choose the right acid, follow the correct timing, and prep your skin beforehand. At-home peels are specifically formulated for consumer use at lower concentrations than professional treatments, and they work on the surface layer of skin only. The risks come from misuse, leaving peels on too long, rushing the prep phase, or skipping sun protection afterward. Follow the process correctly and at-home peels are genuinely safe for most skin types.


Similar Posts

Leave a Reply

Your email address will not be published. Required fields are marked *